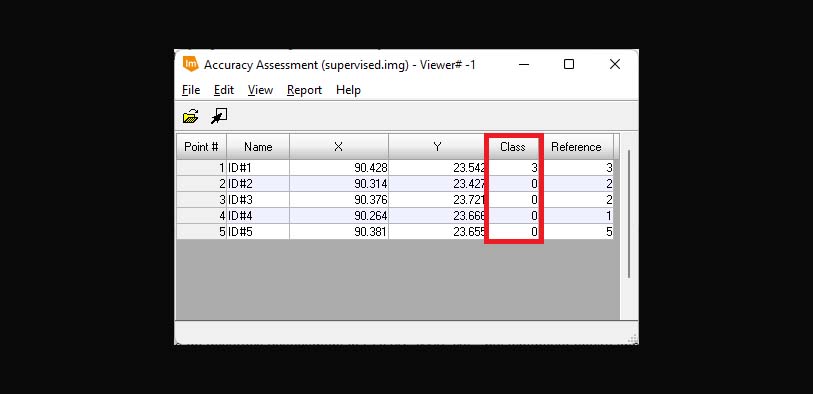
You're trying to do accuracy assessment in ERDAS IMAGINE, but whenever you're importing your user defined points, and click on the show class values, it appreas that you have some or all of the points you've taken from Google Earth Pro is shows as 0 like this:
And now you're confused on why this problem is occuring in the first place. Well this can happen due to two main reasons:
- 1. The point that you took is outside the bounds of your raster image
- 2. The coordinate reference system of the raster and Google Earth Pro isn't the same
Now to fix the first issue you can simply drag and droup the shapefile into Google Earth and from properties and style, color tab you can set the area to outline only and increase the outline width to see the boundaries better. Now you don't need to convert it to km/kml file and then import it. Google Earth Pro is capable of reading shapefiles. Now since you can see the boundaries of your region of interest, don't take any points outside that boundary.

Now the second issue occurs when the input point's coodinates doesn't match your raster's coordinate system. The easiest way to fix it is to use the same coordinate reference system. To do it, make sure of what coordinate reference system your raster file has from ERDAS IMAGINE. Open image on ERDAS IMAGINE, go to the Home Tab > Metadata > View, Edit Metadata. If you click on that you may see a window pop up like this:
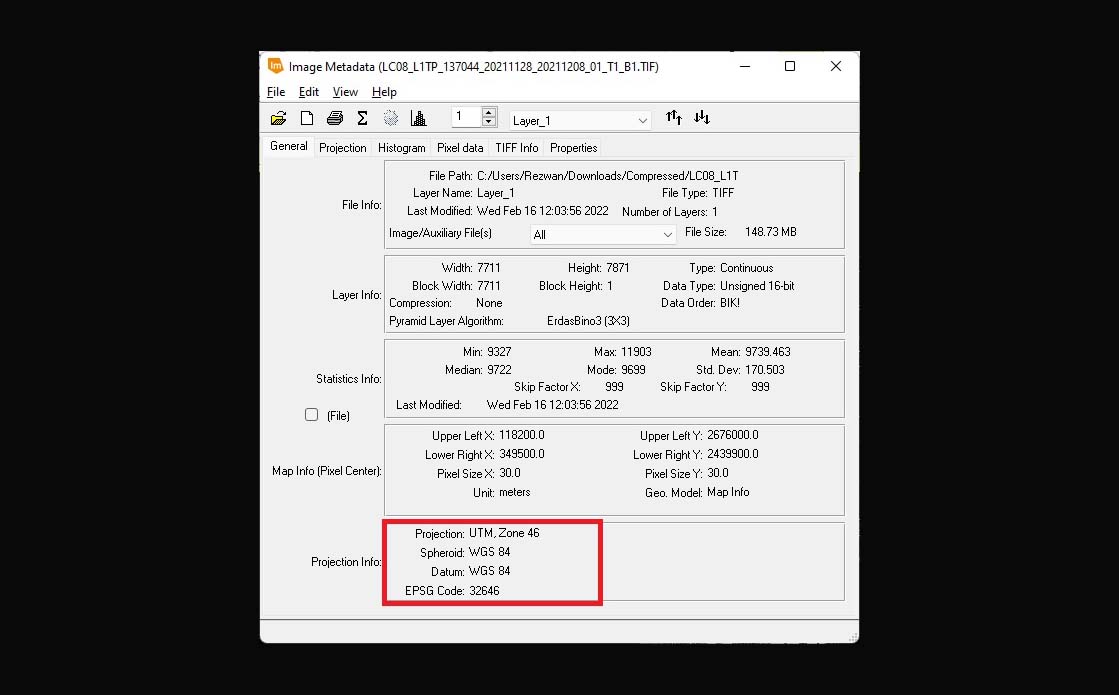
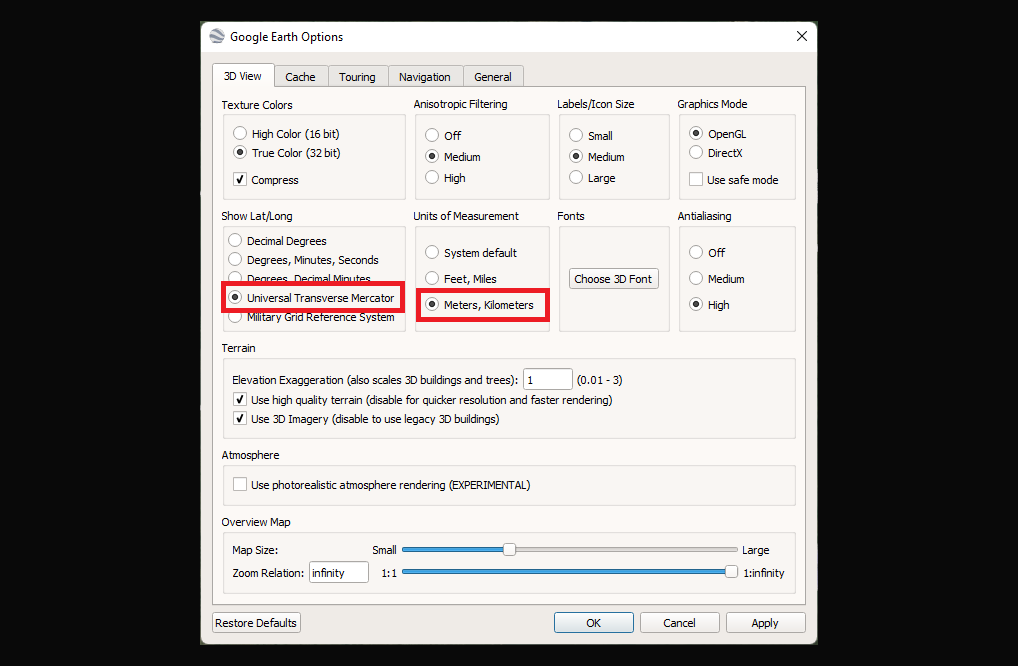
If your raster file has UTM, Zone 46 and your userdefined points are in decimal degrees then of course it will show you class 0 as it'll be way outside the bounds of your image. To fix it, you can simply go to Google Earth Pro then change the Coordinate reference system from Tools > Option and then change it to Universal Transverse Mercator and units to meter and then press apply.
Now take the ground truth points. The X value will be Easting and Y value will be Northing. However, this is actually not the best way to solve your problem. Universal Transverse Mercator projection has 60 different zones. If by any chance your image falls under two different zones, Google Earth will show you the Northing and Easting values of two different zones but your raster image will contain only one zone. So part of your image may not show you zero class during accuracy assessment and the other part that falls into a different zone may show the error. For example when you'll try to do accyracy assessment of Munshiganj district you'll face this error as it falls under two different zones. You can see it from here.
Best Practice
The best practice is to change the projection of your raster to decimal degrees and then take the points in decimal degrees as well. As you take the points in decimal degress you have to input the X first and then Y. I always get this confused because:
X = Longitude = Easting
Y = Latitude = Northing
Make sure you input the Longitude first as it's X and Latitude second as it's Y. Then reproject your raster file from ERDAS IMAGINE by going to Raster tab > Spatial > Reproject. Then set Projection to Lat/Long(WGS 1984) and as always ignore zero in stats and set output location to save your reprojected raster.

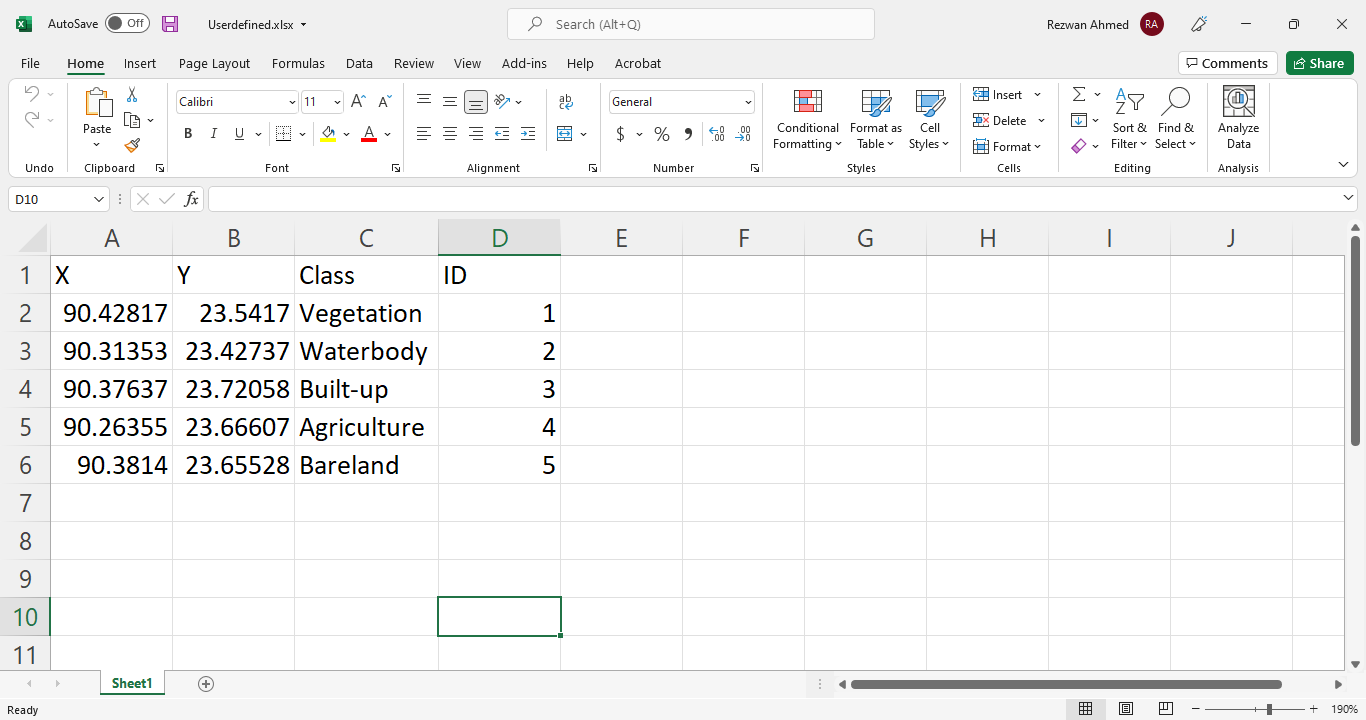
Now take the points from Earth Engine with decimal degress. (You have to set the coordinate projection system to decimal degrees from tools > Options > and set Show Lat/long to Decimal Degrees on Google Earth Pro.) Lastly save the excel file as txt(tab delimited) and import it during accuracy assesment. Your excel file should look like this with Longitude as X and Latitude as Y:
Now start doing accuracy assessment and it won't show any zero class values. That's it! That basically how you fix this problem. A lot of you have been asking me how to solve this issue so I thought I'd create this post for you guys. I hope you find this helpful!